Story
Miss B is a 26 year old female who initially presented to Physio Connection on January 23, 2019 with right medial knee pain and swelling. The right knee pain started 3 days earlier when she was at the gym. She was doing a stretching session and twisted her knee as she stood up from the floor. During this movement she also felt her right patella sublux for a brief moment. This was a familiar feeling for Miss B as she had a significant right patella dislocation 8 years prior and has not been confident with her right knee and leg since.
Past Treatment
Following the initial patella dislocation 8 years ago, Miss B had approximately 10 sessions of physiotherapy over 3-4 months. The focus of this treatment was to improve the strength of the quadriceps and gluteal muscles. There was an initial improvement in her condition but then she plateaued and did not fully recover. There were no investigations, for example an MRI, conducted to identify a reason for this lack of progress. Since then she has had ongoing problems with strength and confidence. She feels like the leg and knee just cannot do certain things, for example: running or lifting a higher load in the gym with squats. Miss B identified these as goals she would eventually like to achieve.
Past Medical History
Miss B had significant childhood asthma between the ages of 7 and 14. Her asthma improved with age, now it is mild and she only occasionally uses salbutamol for symptom relief. Associated with this, Miss B also had episodes of acute bronchitis at the ages of 13 and 17.
Diane’s question:
At this stage of the ‘story-taking’ were you thinking there could be a possible relationship between her thorax function and her right knee?
Phil’s response:
Over the past 9 years, since I first started working with a whole-body approach after completing my first course in the ISM, I’ve focused on having an open mind about the possible links between signs or symptoms throughout the body. So, yes, I was thinking there could be a relationship. The main reason for my suspicion was that she was still having ongoing weakness and confidence with her right leg and right knee 8 years after the original injury. This timeframe is many years longer than it should have taken to recover, especially in the absence of any signs that more a significant pathology was in play.
Diane’s comment:
Good critical reasoning.
Meaningful Complaint
At the initial assessment, Miss B had two main concerns:
- Acute right patella subluxation resulting in: mild patellofemoral swelling, significantly reduced range of motion (80 degrees knee flexion, full extension), significantly reduced right quadriceps activation (Grade 2 strength) and reduced ability to weight-bear through the right leg.
- Long term (over the last 8 years) weakness and reduced confidence with her right knee and leg. She also reported an associated right anterior ankle tightness and restriction into dorsiflexion with squatting.
Initial Treatment Session
At Miss B’s initial treatment session her knee symptoms were too acute to begin addressing the long term picture of her condition. Therefore, this session was focused on:
- Addressing Miss B’s immediate concerns outlined above.
- Gaining Miss B’s trust in order to have her invested in the longer term rehabilitation process.
The following treatment was employed in the first session:
- Release with awareness of the right tensor fascia latae (TFL) and right gluteus maximus.
- Release with awareness of the right genu articularis.
- Home exercise program: gentle knee active range of motion within pain limits; right quadriceps muscle activation (static and inner range).
By the second treatment session 7 days later, the acute symptoms had settled. We could now address long term goals and develop a plan to achieve those goals.
Diane’s comment:
This is a great example of a ‘knee driven knee’. When a patient presents with a 3 day traumatic onset of joint pain and swelling, this is exactly how the session should be managed, well written, well-reasoned Phil
Cognitive Beliefs
Miss B thought she had a moderate reoccurrence of the right knee injury that she sustained 8 years ago. Due to her ongoing difficulty with high loads she thought she would never return to higher level physical activity. Also, her mother has long term knee problems and she thought that she inherited it.
Over the past 8 years she has continued to go to the gym to maintain her fitness and functional capacity, albeit at a lower level than she would like. Even though she did not think there was much that could be done to improve her condition, she was willing to try a new approach to working with her whole body.
Diane’s question:
In the story pain is not mentioned as a persistent complaint (she reports having had ongoing problems with strength and confidence. She feels like the leg and knee just cannot do certain things, for example: running or lifting a higher load in the gym with squats.) What were you thinking at this time could be an underlying mechanism to explain her lack of ability to reach the higher level of physical activity in spite of her prior training?
Phil’s response:
In order to have strength and confidence with running or squatting (or any functional task) we need have optimal alignment, biomechanics and/or control of the areas of the body which are involved in those tasks. Running and squatting are whole-body activities: all regions of the body are needing to co-ordinate together in order perform the task optimally.
So, the underlying mechanisms to explain Miss B’s reduced ability to reach high levels of physical activity may include:
- Non-optimal inter-regional alignment, biomechanics and/or control: for example, thorax over pelvis and/or pelvis over base of support (feet).
- Non-optimal intra-regional (or inter-segmental) alignment, biomechanics and/or control: for example, reduced ability to maintain segmental control of the thorax (control between thoracic rings).
- Reduced neuromuscular activation: for example, right femoral nerve compromise.
- Reduced confidence with higher loads despite having appropriate ABCs of her whole body.
Meaningful Tasks
Miss B identified two tasks which she would like to return to, with confidence:
- Running
- Squats with weights
Based on these meaningful tasks, the following screening tasks were chosen to assess:
- Standing postural screen
- Squat
- Right one leg stand (OLS)
- Standing trunk rotation
Screening Tasks
Standing Postural Screen
A standing postural screen is required to establish the starting position of each body segment for the screening tasks of squat, right OLS and standing trunk rotation.
Miss B had no awareness of symptoms during the standing postural screen.
Findings for the Standing Postural Screen:
Functional Unit #1 (FU#1) = 3rd thoracic ring to hips
Pelvis: Left transverse plane rotation (left TPR) with a congruent left intrapelvic torsion (left IPT).
Hips: Right femoral head (FH) anterior relative to the right acetabulum. This was congruent with the pelvis position.
Thorax: Lower thorax was left rotated – 7th thoracic ring (TR) right translated / left rotated. Upper thorax was right rotated – 3rd and 4th TRs left translated / right rotated.
Lumbar: L5 rotated left. This was congruent with the pelvis position.
Driver for FU#1: No driver found for FU#1 as this was a starting screen.
Functional Unit #2 (FU#2) = cranium to 2nd thoracic ring
Cranium: Neutral.
Cervical spine: C7 left translated / right rotated.
Upper thorax: 2nd thoracic ring (TR) right translated / left rotated.
Shoulder girdle: Intra-shoulder girdle torsion (ISGT) right.
Driver for FU#2: No driver found for FU#2 as this was a starting screen.
Functional Unit #3 (FU#3) = extremities
Knees: Right medial tibiofemoral (TF) joint mildly compressed.
Feet: Normal alignment.
Driver for FU#3: No driver found for FU#3 as this was a starting screen.
Squat
The squat screening task was chosen as this is one of the tasks Miss B identified she would like to improve her confidence with in the gym. An optimal squat strategy is one that has normal alignment, biomechanics and control (ABCs) within each region and between each region of the body: both innominates should remain posteriorly rotated with respect to the sacrum (sacroiliac joint (SIJ) control); the pelvic should remain neutral in the transverse plane and anteriorly tilt as a unit; the femoral heads (FHs) should remain centered in their respective acetabulum; all lumbar vertebrae should remain neutral; there should be not any TR translations / rotations; and all lower limb peripheral joints should move symmetrically with respect to the opposite side. Ideally it should also feel smooth and easy for the subject to perform.
During the squat, Miss B felt she was not able to maintain even weight-bearing through both legs. While there were no right knee symptoms, she did not feel completely confident with her right leg. She also reported a tightness and restriction in the anterior right ankle joint.
Findings for the Squat Task:
FU#1
Pelvis: Left TPR increases at 20% into the squat. Loss of control of the right SIJ 40% into the squat.
Diane's question:
Noted above is a lack of maintaining even weight-bearing through both legs – was there a shift of her center of mass over her base of support that isn’t noted here?
Phil’s response:
Yes, her COM shifted to the right of BOS early in the squat. I realise now that I only reported this as an increase in the left TPR with the squat.
Hips: Anterior right FH translation maintained throughout squat. Medial compression and internal rotation of the right FH occurs at 20% into the squat.
Thorax: Lower thorax – 7th TR translation right / rotation left increases at 20% into the squat. Upper thorax – 3rd and 4th TR translation left / rotation right increases at 10% into the squat.
Lumbar: L5 rotation left increases at 20% into the squat.
Drivers for FU#1: Manual correction of the 3rd and 4th TRs resulted in some improvement (but not full correction) of the ABCs of the pelvis, right SIJ, right hip and L5 in the squat task. Miss B also felt the squat was a little smoother and easier to perform. Therefore, the thorax was the primary driver for FU#1 in the squat screening task, TR 3 and 4 being the primary segments impaired.
Diane’s question:
Did the COM change over her BOS when the TR3 & 4 were corrected?
Phil’s response:
Yes, the COM over BOS improved with correction of TR3 and 4 (but not fully).
Diane’s comment:
If full correction of the pelvis and hip was not achieved with the correction of the thorax, they are still considered as secondary drivers at this point.
Phil’s reflection:
I like your point here: drivers are considered secondary until we can prove they are the best correction.
FU#2
Cranium: not assessed as it was neutral in the standing postural screen.
Diane’s comment:
But it may have changed in the squat task – sometimes impairments in a movement task are not present in neutral standing, or the starting position and only show up as the task progresses, especially if the dura cannot permit elongation in the task, the cranium will often twist or rotate in this situation, so should be screened – make sense?
Phil’s reflection:
Yes, that makes sense.
Cervical spine: C7 translation left / rotation right increases at the initiation of the squat.
Upper thorax: 2nd TR right translation / left rotation was maintained throughout squat.
Diane’s comment:
If the noted L translation/R rotation of C7 increased in the squat and TR2 position didn’t change, something above C7 had to unwind this increase in rotation, which further makes me suspicious of what happened in the craniovertebral region (atlanto-axial joint in particular) and the cranium.
Phil’s reflection:
Good point. I’m not sure to be honest. I won’t miss it next time though!
Shoulder girdle: Intra-shoulder girdle torsion (ISGT) right increases at the initiation of the squat.
Driver for FU#2: Manual correction of C7 improved both the 2nd TR and the shoulder girdle ABCs in the squat task. Correction of the 2nd TR made C7 and the ISGT worse. Correction of the ISGT did not improve C7. Therefore, the neck (C7) was the driver for FU#2 in the squat screening task.
Diane’s comment:
For FU#1 and FU#2 both drivers are translated left/rotated right. Curious at this point as to where this right rotation will be unwound if not above.
FU#3
Knees: Right medial TF joint compression is maintained throughout the squat. There was also non-optimal biomechanics of the femur and tibia (screw-home mechanism) through the squat task: the femur did not externally rotate relative to the tibia as Miss B went into knee flexion.
Feet: Increased compression through the anterior aspect of right talocrural joint. The tibia had a reduced glide anteriorly over the talus.
Driver for FU#3: Decompression of the medial TF joint improved the anterior compression of the talocrural (TC) joint and subjective awareness of anterior ankle tightness through the squat task. Therefore, the right knee is the driver for FU#3 in the squat screening task.
Diane’s question:
In addition to dorsiflexion at the talocrural joint, which you have noted to be reduced, the hindfoot, midfoot and forefoot should all pronate and the foot should lengthen during a squat. Can you describe the optimal biomechanics of the 3 regions of the foot during pronation:
- Osteokinematics and arthrokinematics of the subtalar joints
- Osteokinematics of the midfoot and forefoot
Phil’s response:
- Osteokinematics and arthrokinematics of the subtalar joint in pronation
The subtalar joint is made of up three facets (posterior, middle and anterior) between the talus and calcaneus. Pronation and supination at this joint involves movement primarily in the transverse plane.
Osteokinematics and arthrokinematics of the subtalar joint during pronation are:
-
- the talus rotates medially (in space and relative to the anterior part of the calcaneus) in the transverse plane, plantar flexes in the sagittal plane and adducts in the coronal plane relative to the calcaneus.
Diane’s comment:
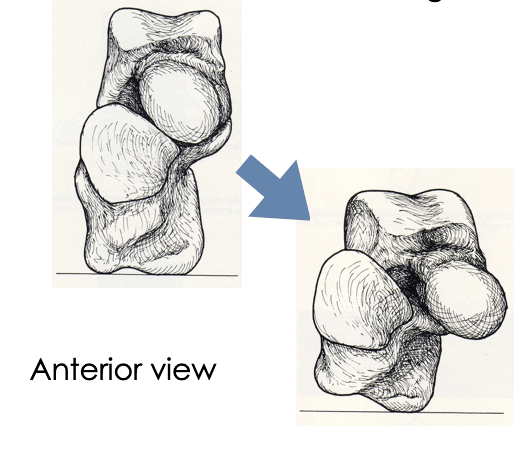
Terminology of the foot is sososo difficult! I can totally see what you are describing here but it is too broken up into the cardinal planes. In other words the talar movement in all three planes is occurring simultaneously so describing the planes in this way is confusing. When looking from the front of the talus/calcaneus the head of the talus moves osteokinematically ‘down and medial’ with no tilting (coronal plane movement) so we have called this motion plantarflexion/adduction – see picture below.

Pronation of the subtalar joint
Phil’s comment:
I love this picture! It is much easier to see how the subtalar joint moves in all three planes simultaneously. Awesome.
-
- the calcaneus rotates laterally (in space and relative to the talus) in the transverse plane
-
Phil’s question from the online support material:
(in the online course material there are 2 contradictory statements about this movement of the calcaneus. One part says: ‘The posterior calcaneus is fixed on the ground such that lateral rotation of the calcaneus moves the anterior part of the calcaneus laterally’. Another part says: ‘During pronation, the anterior (concave) aspect of the calcaneus glides laterally and the posterior aspect glides medially (posteromedially)’. Which description is best to use?
Diane’s response:
Good pick up! The first part is describing the osteokinematics of the calcaneus in space. The posterior part of the bone does not move medially when the heel is on the ground. The axis of motion is through the posterior calcaneus. The next sentence ‘During pronation, the anterior (concave) aspect of the calcaneus glides laterally and the posterior aspect glides medially (posteromedially)’ is describing the arthrokinematics of the two joint complex, in that the anterior concave facet of the calcaneus of the subtalar joint glides laterally (relative to the talus) while the posterior convex facet of the calcaneus of the subtalar joint (that lies in an anterolateral/posteromedial plane) is gliding posteromedially, but the posterior part of the calcaneal BONE is not moving relative to the ground! Can you see this in your mind now what is being described?
Phil’s comment:
Ah, yes, I can see now I was mixing up osteokinematics and arthrokinematics. I have the visual of the movement in my mind now. Thanks!
-
- the calcaneus also plantarflexes in the sagittal plane osteokinematically
- Osteokinematics of the midfoot and forefoot
The optimal osteokinematics of the mid and forefoot during pronation and supination occur around an axis which goes through the middle cuneiform and 2nd metatarsal. During pronation, the bones medial to this axis (ie. navicular, medial cuneiform, 1st metatarsal) rotate externally and the bones lateral to this axis (ie. cuboid, lateral cuneiform and the 3rd, 4th and 5th metatarsals) rotate internally.
Other movements of the mid and forefoot bones that occur during pronation are:
- The medial, middle and lateral cuneiform move plantar in space secondary to the dorsiflexion of the metatarsals.
- The 1st metatarsal abducts from 2nd metatarsal and dorsiflexes.
- The 2nd metatarsal remains neutral with respect to rotation / abduction and dorsiflexes.
- The 3rd, 4th and 5th metatarsals abduct from the 2nd metatarsal and dorsiflexes.
- The phalanges remain extended and the MTP joints flex slightly.
-
Diane’s comment:
Perfect!!
Diane’s next question:
You note that the talocrural joint has sub-optimal biomechanics for this squat task, what happened to the rest of the foot from the standing posture to the squat?
Phil’s response:
As mentioned above, in the standing postural screen, both feet in were in a neutral position. As Miss B squatted, both feet appeared to pronate and lengthen appropriately for the task.
Relationship between drivers of the functional units: comparing corrections of FU#1, 2 and 3 (3rd and 4th TRs, C7, and right knee).
- Correction of C7 improved the 3rd and 4th TRs (but not completely) and the right SIJ, hip and knee (almost completely). Correction of 3rd and 4th TRs improved C7 a small amount, but not the hip, knee and ankle.
- Correction of both C7 and then the 3rd and 4th TR resulted in complete correction of the right SIJ, hip, knee and ankle with the squat task.
- Miss B also reported correction of both C7 and the 3rd and 4th TR resulted in the best feeling of ease and improved confidence with the squat task.
- Therefore, the neck (C7) is the primary driver and the thorax (3rd and 4th TRs) are the secondary driver for the squat task.
Diane’s question:
What made you choose a primary/secondary driver in this scenario and not a co-driver? Please include in your answer the definition of each type of driver.
Phil’s response:
Why did I use primary/secondary driver in this scenario?
I chose C7 as the primary driver because, when it was corrected, it had a large effect on the 3rd and 4th TRs, right SIJ, right hip and right knee (almost full correction in all regions). However, when the 3rd and 4th TRs were corrected it resulted in only a small amount of improvement in C7, right SIJ, right hip and no change in the right knee or ankle.
Defining different types of drivers
Firstly, it is pertinent to observe the timing of region/s of the body with non-optimal ABCs for a meaningful task (i.e. at what point in the task does each region start to display non-optimal ABCs?). The region/s that display the earliest non-optimal ABCs are frequently the ones driving the non-optimal ABCs in other regions.I referred to your new 2018 version of The Thorax text book for an up-to-date answer for this question. Primary driver: the region that, when corrected, results in the complete correction of all other regions with non-optimal ABCs for the meaningful task.
Primary driver with secondary driver: correction of one body region results in complete correction of most regions of non-optimal ABCs and an improvement, but not full correction, in another region with non-optimal ABCs for the meaningful task.
Co-driver Type 1: correction of one body region results in worsening of ABCs for another body region for the meaningful task, however, correction of both regions improves the task performance. Co-driver Type 2: correction of one body region results in improvement of ABCs for another body region and correction of the other body region improves the ABCs of the first for the meaningful task.
Diane’s question:
Of course I would think this was correct! Does it make sense to you?
Phil’s comment:
Yes, the scenario that I’ve described seems to fit into both the ‘Primary driver with secondary driver’ and the ‘Co-driver Type 2’ categories. Though, on deeper reflection, it is probably more the ‘Co-driver Type 2’ because correction of the 3rd and 4th TR did improve C7 a small amount in the meaningful task of squatting.
Diane’s question:
What about the residual loss of control of the right SIJ and alignment of the right hip – did they correct with any correction in FU#2 or 3? They didn’t completely correct with the thorax correction. Although below, you note that the thorax resulted in complete restoration of function of the right SIJ and Hip in the ROLS task. If true, this is highly suggestive of a foot fault i.e. lack of pronation right foot? That’s the big difference between the squat and OLS task.
Phil’s response:
Yes, the right SIJ and right hip improved (almost completely) with correction of C7 and their ABCs were completely restored with correction of C7 and the 3rd and 4th TR.
Right One Leg Stand (OLS)
The one leg stand screening task was chosen as Miss B wants to return to running. A prerequisite for running is the ability to stand effectively on one leg. Miss B was less confident and found it more difficult to stand on her right leg compared to her left.
Findings for the right OLS screening task:
FU#1
Pelvis: Left TPR is maintained and there is loss of control of the right SIJ at 40% into the right OLS task.
Diane’s question for clarification:
When you say ‘at 40% into right OLS task’ do you mean 40% beyond the 50% load sharing position required for standing? I ask because if she lost control with 40% of her weight being taken through the right leg, then she would be ‘unlocked’ in standing, and she wasn’t – so I’m just trying to gain clarity in your language use of percentages for when things happen in a task.
Phil's response:
By 40% I mean almost half between the 50% load sharing position and 100% on the right leg. Therefore, I should say 70% into the right OLS task if two-legged standing is 50%.
Diane’s response:
Thanks for the clarification.
Hips: Right FH maintains right anterior translation relative to the acetabulum.
Thorax: Lower thorax – 7th thoracic ring maintains translation right / rotation left in the right OLS task. Upper thorax – 3rd and 4th TR translation left / rotation right increases at 10% into the right OLS task.
Driver/s for Functional Unit #1: The 3rd and 4th TRs were the first segments to display non-optimal ABCs. Manual correction of the 3rd and 4th TRs resulted in restoration of the ABCs of the right SIJ and right hip in the right OLS task. Miss B also felt the squat was easier to perform and she improved confidence. Therefore, the thorax (3rd and 4th TRs) was the primary driver for FU#1 in the right OLS screening task.
FU#2
Cranium: not assessed as it was neutral in the standing postural screen.
Diane's comment:
Same comment as for the squat task. Not sure we can assume that a neutral starting position will be maintained throughout a movement task.
Cervical spine: C7 translation left / rotation right increases at the initiation of the right OLS.
Upper thorax: 2nd TR right translation / left rotation was maintained with the right OLS.
Shoulder girdle: ISGT right increases at the initiation of the right OLS.
Driver for FU#2: Manual correction of C7 improved both the 2nd TR and the shoulder girdle ABCs in the right OLS task. Correction of the 2nd TR made C7 and the ISGT worse. Correction of the ISGT did not improve C7. Therefore, the neck (C7) was the driver for FU#2 in the right OLS screening task.
FU#3
Knees: Right medial TF joint compression is maintained with the right OLS.
Feet: not assessed as was neutral in the standing postural screen.
Diane's question:
Do you expect there to be any positional change in the hindfoot, midfoot or forefoot when moving from double leg standing to single leg standing? In other words, in single leg stance should the foot be pronated, neutral or slightly supinated for effective load transfer?
Phil’s response:
For optimal load transfer in single leg stance, the foot should be slightly supinated compared to double leg standing. This is necessary as the center of mass (COM) has moved laterally over the weight-bearing foot. All the bones and joints of the lower limb need to adjust in order to optimise the load transfer (and avoid excessive compression or shearing forces through the joints or non-optimal forces through the myofascial and neurovascular structures).
Diane's response:
I agree, but know of no evidence to validate/confirm our clinical opinion.
Driver for FU#3: The right knee is the driver for FU#3 in the right OLS screening.
Relationship between Drivers of the Functional Units: comparing corrections of FU#1, 2 and 3 (thorax, (3rd and 4th TRs), neck (C7), and right knee).
- Correction of C7 improved the 3rd and 4th TRs (but not completely) and the right knee (almost completely). Correction of the 3rd and 4th TRs improved C7 a small amount, but not the right knee.
- Correction of both C7 and then the 3rd and 4th TR resulted in complete correction of the right knee in the right OLS task.
- Miss B also reported correction of both C7 and the 3rd and 4th TR resulted in the best feeling of improved confidence and balance with the right OLS task.
- Therefore, the neck (C7) is the primary driver and the thorax (3rd and 4th TRs) is the secondary driver for the right OLS task.
Summary Point: The drivers are the same for both the squat and the right OLS task.
Standing Trunk Rotation
Standing trunk rotation is a useful screening task for two reasons:
- Trunk rotation is necessary for optimal biomechanics in running. The trunk needs to counter-rotate with respect to the pelvis and lower extremity. If the trunk cannot rotate optimally in either direction there may be adverse consequences in any part of the body, especially load-bearing regions.
- It provides another feedback mechanism for patients to feel when there body is and is not moving optimally.
When attempting standing trunk rotation, Miss B was not able to feel any limitations of movement nor any differences in quality between rotating right or left. For this reason, we used seated rotation as a screening task.
Diane’s question:
Did you observe any limitations or differences in quality of the rotation between sides? Why would seated rotation bring more awareness to this task?
Phil's response:
No, there were no perceivable limitations or differences in quality of rotation to the right or left. Seated rotation brings more awareness to the rotation task as the pelvis is now (relatively) fixed and there is no rotation contribution from the lower limb joints. If there are restrictions in any joints between the cranium and the feet, during standing trunk rotation, then many other joints can compensate. However, during seated trunk rotation, there are less joints that can compensate for any restriction. The patient’s awareness is also focused on a smaller region of her body and any differences are easier to perceive.
Seated Trunk Rotation
Miss B had reduced left trunk rotation (60% of full rotation) compared to right trunk rotation (80% of full rotation). Miss B also found it more of an effort to rotate left compared to right. For this reason, left rotation was the primary focus in this task. In addition, left trunk rotation is also necessary for an optimal right OLS, which Miss B also has difficulty with.
Diane’s question:
Why would the trunk be required to rotate to the left during a simple right OLS task? I’m confused here?
Phil’s response to clarify the point above about left trunk rotation being necessary for right OLS:
Thanks for highlighting this point for me. I used the right OLS as a screening task for running. I now realise that I haven’t been using a simple OLS to observe non-optimal ABCs in regions of the body. I have been using a more complex and integrated OLS by instructing my patients to incorporate their whole body in the movement as if they’re walking or running. This cues them to rotate their pelvis ipsilaterally and thorax contralaterally. I should then describe this screening task as a ‘right OLS with intention to walk or run’.
Diane’s comment:
Or what about ‘right OLS with slight left trunk rotation’? Is highly relevant for her meaningful task.
Phil’s response:
Yes, that is much a clearer description. Thanks.
Findings for the Left Seated Trunk Rotation Screening Task:
FU#1
Pelvis: Pelvis maintains left IPT and left TPR.
Diane’s clarification:
In the squat task, you report that the right SIJ lost control at ‘40% into the squat’. Therefore, it is highly plausible that she was sitting with the right side of her sacrum counter-nutated relative to the right side of her innominate. Did you check for SIJ control as she sat before testing left seated trunk rotation? Or did you assume that because the pelvis was rotated left in the transverse plane and the innominate was anteriorly rotated on the right and posteriorly rotated on the left that the sacrum would be relatively nutated bilaterally? Strategies for pelvic control can be impacted by loss of the form closure mechanism when sitting and thoracic ring findings can be pelvic driven in this case.
Phil’s response:
Yes, as reported above in the squat task assessment, the right SIJ control was lost at 40% into the squat. This was the same for standing to sitting. So, I should correct the statement of ‘Pelvis maintains left IPT’ to ‘There was loss of control of the right SIJ (right side of her sacrum was counter-nutated relative to the right side of her innominate when sitting)’.
Diane’s comment:
It is a common finding when individuals sit with a counternutated sacrum relative to the ipsilateral innominate (unlocked as we call this) to have over-activation of the thoracic longissimus whose aponeurotic distal extension attaches to the dorsum of the sacrum. This attempt to increase the force closure mechanism for pelvic control comes at a cost of thoracic alignment and mobility and thus can indirectly impact your alignment and mobility findings in sitting. Something to watch for.
Phil’s comment:
Yes, I have found this to be a common in patients who have difficulty relaxing their thoracic longissimus.
Hips: Right hip maintains anterior translated.
Thorax: 3rd and 4th TRs maintain their relative left translation / right rotation position throughout the left seated trunk rotation task.
Driver for FU#1: Manual correction of the 3rd and 4th TRs was more difficult in sitting, so they were corrected in standing and then Miss B sat down to assess the impact of the correction on left trunk rotation.
Diane’s comment and question:
This is a very interesting finding and supports my prior suggestion (and current comment about the mechanism of this finding) that she was sitting with loss of control of the right SIJ.
- Where is the inferior attachment of the fascicle of iliocostalis from the right 4th rib?
- If there was over-activation of this fascicle and a deficit in motor control of the pelvis, what would the impact of this over-activation be on the innominate biomechanics relative to the sacrum, and the impact on the right 4th rib?
- What would the resultant position be of the 4th thoracic ring be?
Phil’s response:
- The inferior attachment of the fascicle of iliocostalis lumborum from the right 4th rib is to the medial posterior superior iliac spine (PSIS).
- If there was over-activation of this fascicle, and a deficit in motor control of the pelvis, it would result in an anterior rotation of the right innominate relative to the sacrum (unlocking of the right SIJ). The right 4th rib would be posteriorly rotated.
- The 4th thoracic ring would be in a left translated / right rotated position.
Diane’s comment:
and it was! Making sense? This doesn’t mean that the pelvis is the driver by any means but helps to understand a potential reason why it was easier to correct the alignment of her thoracic rings in standing vs sitting.
Phil’s response:
Yes, makes sense. Thanks for highlighting it!
As stated above with the squat task, correction of the 3rd and 4th TR improves (but didn’t completely restore) the pelvis and right hip alignment and biomechanics. This was also the case with sitting down onto the treatment table. While maintaining the correction of the 3rd and 4th TRs, both left and right trunk rotation improved to approximately 90% of full rotation. Therefore, the thorax (3rd and 4th TRs) was the primary driver of FU#1 for left trunk rotation in sitting.
FU#2
Cranium: not assessed as it was neutral in the standing postural screen.
Diane:
Same comment as before re this omission.
Cervical spine: C7 translation left / rotation right was maintained through the movement.
Upper thorax: 2nd TR right translation / left rotation was maintained through the movement.
Shoulder girdle: ISGT right was maintained through the movement.
Driver for FU#2: As for FU#1, C7 was corrected in standing before sitting down and testing left trunk rotation. Correction of C7 improved both the 2nd TR and the shoulder girdle. It also improved left trunk rotation approximately 10-15%. Therefore, the neck (C7) is the primary driver of FU#2 for left trunk rotation in sitting.
FU#3
FU#3 was not assessed for the trunk rotation in sitting task as correcting C7 and the 3rd and 4th TRs cleared the medial TF joint and anterior TC joint compression in standing and during the squat task.
Diane’s comment:
But it might have been relevant for standing trunk rotation in that standing trunk rotation requires more motion of the feet and would be highly relevant for her meaningful task of running.
Relationship between Drivers of the Functional Units: comparing corrections of FU#1 and 2 (thorax (3rd and 4th TRs) and neck (C7)).
- As stated above, correction of C7 improved the 3rd and 4th TRs (but not completely). Correction of 3rd and 4th TRs improved C7 a small amount. However, correction of 3rd and 4th TRs improved trunk rotation better (subjectively and objectively) than C7. This implies the thorax is the primary driver and the cervical spine is a secondary driver for the task of trunk rotation.
- Correction of both C7 and the 3rd and 4th TR resulted in full restoration of trunk rotation to the left and right. Miss B also reported correction of both C7 and the 3rd and 4th TR resulted in the best feeling of ease and range of motion left trunk rotation task.
- Conclusion: the thorax (3rd and 4th TRs) is the primary driver and the neck (C7) is the secondary driver for the left trunk rotation task.
Screening Tasks Summary
The results of the above screening tasks provide us with the most ideal part of the body to investigate further. A primary driver is defined as the area of the body that, when corrected, yields the best response in the ABCs of the other areas of the body. Ideally this also leads to a subjective improvement in pain, ease of movement or strength. Similarly, a secondary driver also improves other areas of the body, but not as much as a primary driver. There are also scenarios where two areas of the body equally improve ABCs in other areas of the body. These are called co-drivers.
A summary of Miss B’s findings so far are:
- Squat: primary driver = cervical spine: C7, secondary driver = thorax: 3rd and 4th
- Right OLS: primary driver = cervical spine: C7, secondary driver = thorax: 3rd and 4th
- Seated trunk rotation: primary driver = thorax: 3rd and 4th TRs, secondary driver = cervical spine: C7.
Further Assessment of the Drivers, including Vector Analysis
Now that the primary and secondary drivers for the meaningful tasks had been identified, further assessment of the drivers was required to determine the type of system impairment (neuromuscular, visceral, myofascial or articular) that was causing non-optimal ABCs. This assessment includes interpretive reasoning of:
- Active mobility
- Active control
- Passive mobility
- Passive control.
A vector analysis was conducted during active and passive mobility testing to determine direction, length and location of the vector/s that caused the non-optimal ABCs.
Further Assessment of C7
- Active mobility: C7 was restricted into left cervical spine rotation and had no limitation into right cervical spine rotation.
- Passive mobility: when correcting C7, vector analysis revealed a short inferior anterolateral vector on the left side. This vector was identified as the scalenus minimus muscle (also known as the transverse pleural ligament). It originates on the pleural dome, runs against the anterior scalene and inserts into the transverse process of C7 (and sometimes C6). This anatomical entity is a blend of both visceral (part of the suspensory apparatus of the pleura) and neuromuscular systems (a cervical spine muscle). A further confirmation of this vector was achieved by observing the response of C7 with a breath hold on inspiration. With this manoeuvre, C7 was unable to be corrected. Therefore, this is a blend of visceral and neuromuscular system impairments.
- Active control test: is used to evaluate the force closure mechanism provided by the chosen motor control strategy, which is known to be individual and task specific. It was not tested at this point as the alignment of C7 was non-optimal. It will be tested at a subsequent treatment sessions with the identified screening tasks of squatting and right OLS.
- Passive control tests: evaluate the form closure mechanism (the ability of the passive components (capsule, ligaments) of the joint to resists shear forces). This was not tested as there was no indication from the history (ie. no trauma) that passive control components of C7 would be compromised.
Diane's comment:
I love the technique of trying to correct C7 with the breath held on inspiration to differentiate system vectors! Very cool technique! Same structure as Sibson’s fascia?
Phil’s response:
I wasn’t aware of the anatomical name ‘Sibson’s fascia’. After doing some research, yes, scalenus minimus (or transverse pleural ligament) is part of Sibson’s fascia (also known as the suprapleural membrane). Sibson’s fascia is also made up of the costopleural ligament, which is another part of the suspensory apparatus of the pleura. This part of the fascia connects between the pleura and the 1st rib.
Further Assessment of the 3rd and 4th TRs
- Active mobility: left seated trunk rotation was used to assess the active mobility of the 3rd and 4th Active listening for vectors (part of vector analysis) during left seated trunk rotation revealed the same vectors as noted below during passive mobility testing.
- Passive mobility: when correcting the 3rd and 4th TRs, vector analysis during correction revealed two medium length parallel vectors which originated from the lateral aspect of the TRs and towards the medial border of the scapula. These vectors were identified as the left serratus anterior, confirmed by palpable hypertonic muscle fibres. The correction of this neuromuscular system impairment was difficult to attain, however, by correcting slowly, incrementally and with the breath, the local region did relax and it was possible to correct most of the malalignment.
Diane's question:
Passive listening #2 is about paying attention to the vectors and their impact on the thoracic ring alignment during release of the correction. What did you feel on release of the correction?
Phil’s response:
On release of the correction I felt the hypertonic muscle fibres of the left serratus anterior pull the 3rd and 4th TRs into left translation / right rotation. These vectors were from the lateral aspect of the TRs towards the medial border of the scapula.
Diane's comment:
This is exactly what happens when serratus anterior is over-active and confuses a lot of clinicians who use more of their left/logical brain than their hands to feel vectors. The alignment of the scapula is easier to perturb than the massive rib cage so this muscle will not posteriorly rotate a rib and induce a contralateral translation of the ring when overactive; the thoracic ring appears to translate to the same side as the impaired muscle.
Phil’s response:
I remember this was one of the interesting phenomenon when I first started working with the Thoracic Ring Approach in 2010. It was also the time when I realised just thinking about anatomy in a left/logical brain way was not the only way to interpret the body. I started to learn to trust what my hands were feeling and follow what the body was telling me rather than just interpreting my findings with a logical thought process.
- Active control: was not tested at this point as the alignment of the 3rd and 4th TRs were non-optimal. It will be tested at a subsequent treatment sessions with the screening tasks of squatting and right OLS.
- Passive control: this was not tested as there was no indication from the history (ie. trauma) that passive control components of the 3rd and 4th TR would be compromised.
Further Assessment of the 3rd and 4th TR after Treatment of Serratus Anterior
- Passive mobility: after the serratus anterior fibres were treated with a ‘release with awareness’ (RWA) technique, another vector was revealed with passive mobility testing which was attached to the posterior elements of the 3rd and 4th
Diane's question:
Can you be more specific as to what these posterior elements were? i.e. the vertebrae? The medial anterior ribs?
Phil’s response:
The posterior elements of the 3rd and 4th TR were the anterior part of the vertebral body and the anterior tubercles of the transverse processes.
Diane's question:
And did you determine this by doing a thoracic ring correction or a Barral listening technique? It is totally OK to integrate methods Phil – you are skilled at both and it would be nice to read/see that integration.
Did you do a general listening and then a local listening to confirm anything? Did the listening ala Barral correlate with your ISM assessment? Would be great to show other readers how the two methods enhance one another – they are compatible and not competitive.
Phil’s response:
I determined this by:
-
- general listening from the cranium: it took me anterior to the spine, central and above the diaphragm.
- listening at the 3rd and 4th TRs:
- passively (when I palpate the TRs laterally, what do I notice?).
- during a correction of the TRs.
- while releasing the TR correction.
- listening at the spinous processes of the 3rd and 4th thoracic vertebra.
- listening through the body both anteriorly (from the pericardium) and posteriorly (from the spinous processes of the 3rd and 4th thoracic vertebra). Here we are connecting the either end of the vertebropericardial ligament and feeling for the connection between my hands.
- A fascial load may also be necessary if the vitality of the tissues is low and the listening is not clear.
- Another confirmation is achieved with a posteroanterior (PA) compression / decompression test of the 3rd and 4th thoracic vertebra in prone. In the Barral approach, there always needs to be a mobility test to confirm your local listening.
- Not all of these tests are necessary to confirm the listening but can be useful if the listening is not clear.
-
- The vector went deep into the center of the thorax. It was a short to medium vector that created a ‘stickiness’ when a correction of the 3rd and 4th TRs was attempted. This vector was identified as the inferior part of the vertebropericardial ligament. The vertebropericardial ligament blends into the endothoracic fascia and the anterior longitudinal ligament.
- This is a visceral system impairment.
Diane's comment:
Love the integration of analysis!
Further Assessment between C7 and the 3rd and 4th TRs
- Passive mobility: after the vertebropericardial ligament was released, another vector was identified between C7 and the 3rd and 4th This vector felt like it created a slight compression between the two drivers and they were not able to move completely independently of each other. This vector originated anterior to C7 and connected within the 3rd and 4th TRs. This anatomical entity was identified as the prevertebral layer of the deep cervical fascia at the C7 level and the endothoracic fascia at the 3rd and 4th TR levels. These two layers of fascia are continuous with each other. This is a myofascial system impairment.
Diane’s comment for the ISM readers:
This level of intra-thoracic, cervical differential listening is not possible with merely correcting the skeleton. Here you can see the level of skill Phil has in the visceral system due to his training with the Barral Institute.
Phil’s comment:
Listening at every stage in the assessment gives information about the local structures and their relationship with the anatomy close and further away from that area. This assessment relies on the skill of extended listening which can be performed passively and/or actively.
Hypothesis
Miss B’s difficulties with her right knee and leg started 8 years ago with a right patellofemoral dislocation. Even though she spent 3-4 months attempting to rehabilitate the injury, her strength and confidence never fully returned. Consequentially she just modified her activities to stay within her loading capacity and comfort zone.
My hypothesis is that the non-optimal ABCs of the various areas of the body outlined so far (primary driver: cervical spine with C7 neuromuscular / visceral impairment, secondary driver: thorax with 3rd and 4th TR neuromuscular impairment, pelvis, right hip, right knee and right ankle) had existed before the injury to varying degrees. While it is not possible to definitively say, they may have even contributed to the initial patellofemoral dislocation 8 years ago. The primary and secondary drivers may have been related to the history of asthma and bronchitis. Infections, persistent coughing and increased work of breathing could cause the restrictions found in the muscles and ligaments connecting between the pleural dome and C7; the pericardium and the 3rd and 4th TRs; and the fascia connecting between C7 and the 3rd and 4th TRs. They would also increase the likelihood of hypertonic serratus anterior and pectoralis minor fascicles.
Diane's question:
Did you explain this hypothesis to her and how did she react?
Phil’s response:
Yes, I explained this hypothesis to her and it was a bit of a ‘light bulb’ moment for her! Before this explanation she just thought she hadn’t recovered due to her family history of knee problems.
Diane's comment:
Empower through knowledge!
Treatment Plan
A treatment plan was developed using the principles of the Integrated Systems Model (ISM): first release and align the primary and secondary drivers, then teach strategies to connect with and control these drivers, and finally integrate these new ABCs into the meaningful tasks identified by Miss B. The treatment plan for the second treatment session was:
Release
- Primary driver – cervical spine with C7 neuromuscular / visceral impairment: left scalenus minimus technique*.
- Secondary driver – thorax with 3rd and 4th TR neuromuscular impairment: release with awareness of left serratus anterior muscle fibres connecting between the medial border of the scapula and the lateral aspect of the 3rd and 4th ribs; inferior vertebropericardial ligament technique*.
- Stack and breathe C7 and 3rd and 4th TR: to release of common posterior fascial line of the deep cervical prevertebral fascia and endothoracic fascia.
Align
- Primary driver – cervical spine with C7 neuromuscular / visceral impairment: an effective cue was “float C7”.
- Secondary driver – thorax with 3rd and 4th TR neuromuscular impairment: an effective cue was “relax and float the left scapula”.
Control
- As the correction of C7 and the 3rd and 4th TR with release and align resulted in optimal control of the right SIJ, hip, knee and ankle, no connect cue was necessary at this stage.
Diane's comment:
Perfect!! Most people miss this explanation.
Move
- Integration of the align cues with whole body movement progressions, as able:
- Squat
- Right OLS
- Progress to right single leg squat (small ranges to simulate running)
The above ‘move’ exercises became her home exercise program. Each exercise was to be performed 3 sets of 10 repetitions, twice a day. Miss B was engaged and responded well to the ISM approach. She realised how important it is to have focused attention while integrating align cues and whole body movement.
Followup treatment sessions
Over the next two sessions the relationship of the drivers started to change:
- Treatment session 3
- Primary driver: thorax with 2nd TR neuromuscular impairment – vector from right pectoralis minor.
- Secondary driver: cervical spine with C7 visceral impairment – vector from right pleurovertebral ligament*.
- Treatment session 4
- Primary driver: thorax – articular system vector from 4th left costochondral joint.
- Active control of the 4th TR: As Miss B improved, the difficulty of each task was progressed with repetition, weight and speed. When adding these complexities, it was noted that Miss B was not able to maintain an optimal alignment of the 4th Palpation of the deep thoracic multifidus at the 4th TR revealed a deficit in the muscle bulk at that level. Therefore, a connect cue was incorporated into the treatment plan to increase the capacity of the deep thoracic multifidus to control the 4th TR in high load tasks.
Explanatory Notes
* This case study utilises three techniques from the Barral Institute’s Visceral Manipulation
courses:
- Scalenus minimus technique (also known as the transverse pleural ligament technique)
- Inferior vertebropericardial ligament technique
- Right pleurovertebral ligament technique
Conclusion
- After the 4th session, the focus of treatment was on 2 main elements:
- Restoring optimal active control of the upper thorax.
- Releasing non-optimal activation habits of the muscles attached to the upper TRs.
- This was difficult for Miss B as her job required long hours sitting at the computer.
- Outcome
- Miss B was encouraged to continue retraining her postural patterning as she could now:
- Squat smoothly with even weight-bearing. She now felt confident to gradually load more at the gym.
- Start to build up her running – I referred her to a running coach who also incorporates whole-body and specific segmental cuing to optimise running patterns. We’re very lucky to have such a coach in Canberra who utilises cues which are very similar to ISM movement training!
- Miss B was encouraged to continue retraining her postural patterning as she could now:
Diane's comment:
Great case report Phil!
Skills Demonstration
Note to viewer from Diane:
Phil uses language with this patient we are trying to avoid, that being the term ‘ring shift’. Rings don’t shift but it is a quick and easy thing to say but leaves the patient potentially with the wrong impression. They translate/rotate and Phil’s body language in these videos is accurate, just his words could be different – he knew that when he submitted this report!
Mr. S is a cyclist who has a meaningful complaint of left superior SIJ pain. The pain started after a fall with cycling 3-4 years ago, where he had a displaced fracture of his left clavicle. Now his main aggravating activity is cycling. The left SIJ pain is generally aggravated at around 30km into a ride, or when cycling faster with a higher load.
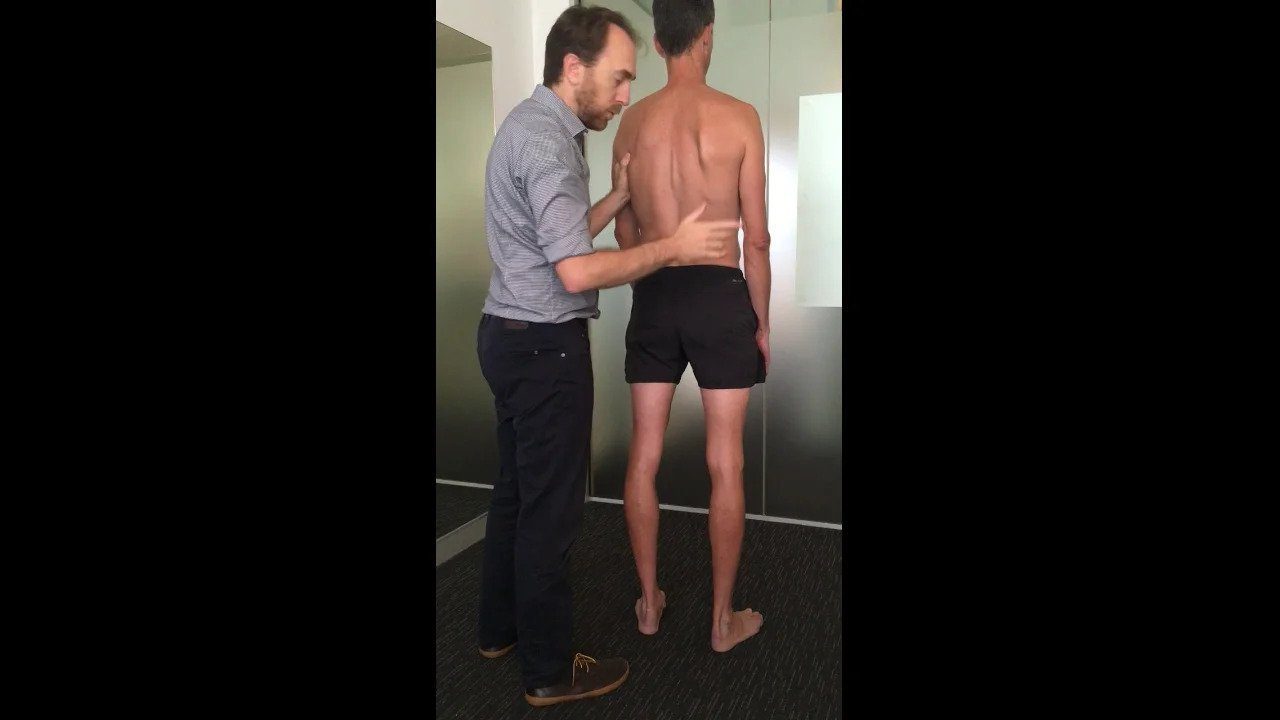
Video 1 (2:18) demonstrates:
- A brief introduction to the case of Mr. S.
- The assessment to determine the primary driver (3rd TR) in the screening task of squatting to the bike position.
Diane's questions:
How did you know the pelvis was in an IPT in standing rather than standing with one SIJ unlocked? If you start with unloading one leg and then progressively add weight back to that leg to 50% you would have known if the TPR was associated with an IPT (both sides of the sacrum remain nutated in this instance) or if one SIJ had lost control for the standing position. It appeared that the left SIJ lost control in the squat but it goes very fast in the video I couldn’t see it!
How did you know that correcting his pelvis wouldn’t improve his thoracic ring alignment given what we know about iliocostalis/longissimus and the relationship between the thoracic rings and the pelvis?
I would have liked to see a pelvis correction not change the alignment of the thoracic rings and C7 for final confirmation of a thorax driver.
Phil’s response:
Yes, unfortunately both of these elements were not demonstrated in the videos, as I had done them in previous sessions with Mr. S. The left SIJ was adequately controlled in standing and correction of the pelvis made the alignment of the upper thoracic rings and C7 worse. Correction of the pelvis also made no change to the left SIJ symptoms when Mr. S was in his bike position.
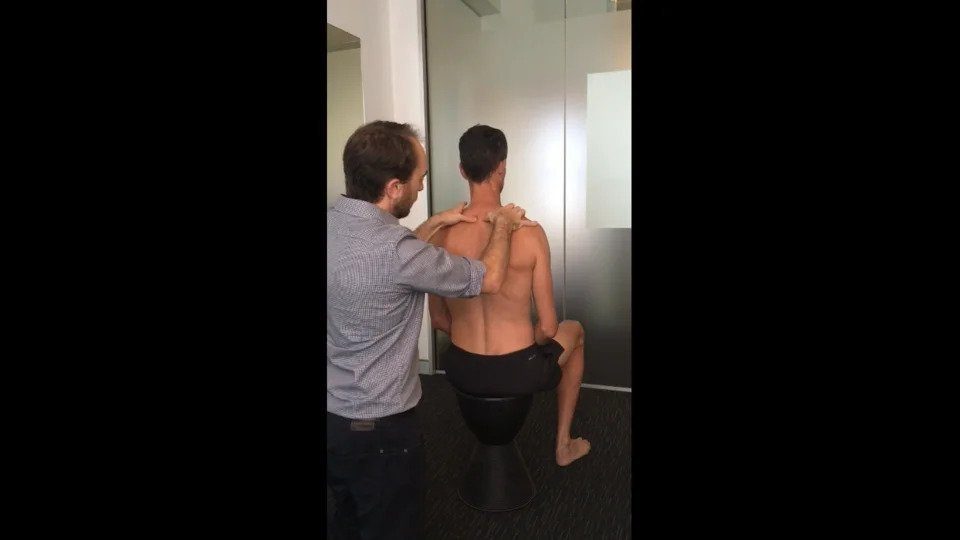
Video 2 (4:07) demonstrates:
- Further assessment of the 3rd TR including vector analysis in the meaningful task of cycling.
- Patient education regarding the left pectoralis minor vectors causing the non-optimal ABCs of the 3rd
- Teaching a relax cue for the left pectoralis minor affecting the 3rd
- Palpation of thoracic multifidus and noting of atrophy at the 3rd
- Patient education regarding the active control deficits of the 3rd TR and the consequences on the rest of the body.
Diane's comment:
When you need to use two hands to correct two thoracic rings translated in the opposite direction, it is sometimes difficult to check if pelvic control has been restored. You can see a change in a TPR of the pelvis but for testing the impact of the correction on pelvic control we often rely on the subjective experience of the patient. Next time you are in this situation, try this. Correct the two thoracic rings, have them reset the feet (this piece is missing in the first two videos as well and this can have huge implications for the hips and thus the pelvis through the pelvic floor) and then squat to get a sense of change – THEN – have them stay in the squat and release the thoracic ring corrections. If the pelvis alignment and control has been restored by the thoracic ring corrections both you and the patient will see/feel an immediate change when you let the correction go – very confirming.
Phil’s response:
Nice, I can see I need to do more work correcting and releasing the correction of the driver/s through the different stages of each meaningful task. This will give both my patients and I another confirmation we are intervening in the most appropriate region of the body.
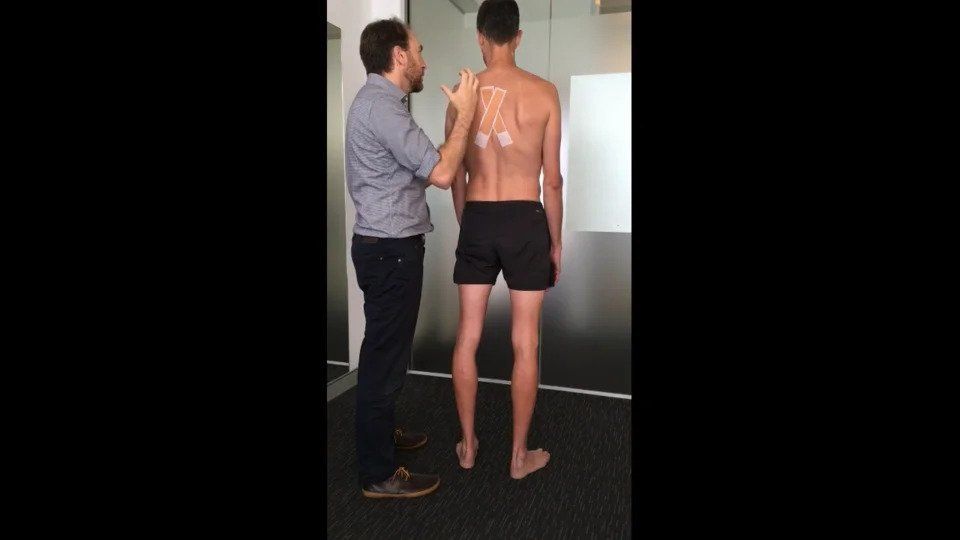
Video 3 (5:45) demonstrates:
- Correcting and then taping of the 3rd TR on the left posterior rib.
- Correcting and then taping of the 3rd TR on the right posterior rib.
- Teaching hook (connect) cue for the thoracic multifidus.
- Positive feedback when teaching a new cue in the meaningful task.
- Improved subjective (patient) performance of the screening task of squatting to a low bike position.
Diane's comment:
Language for the hook cue and segmental multifidus. I like to open the conversation with something like this – you can’t strengthen a muscle your brain isn’t using so the first thing we have to do is ‘reconnect your brain’ to this muscle – multifidus – that is necessary for stopping this thoracic ring from translating/rotating. Then do a ‘load effort’ analysis and show them how different that task feels when they engage the appropriate segmental DMF – buy in for Stage 1 training!
Phil’s response:
Thanks Diane. Yes, the language we use is essential to motivate our patients to be engaged in their rehab. I find this region (the thorax) of the body is particularly challenging when comes to training segmental control. Thank you for your wise words to help facilitate this process with my patients!
Case Study Author

Clinical Mentorship in the Integrated Systems Model
Join Diane, and her team of highly skilled assistants, on this mentorship journey and immerse yourself in a series of education opportunities that will improve your clinical efficacy for treating the whole person using the updated Integrated Systems Model.
{"first_class":"1","title":"Heading","show_title":"0","post_type":"course","taxonomy":"","term":"","post_ids":"3346","course_style":"recent","featured_style":"custom_block_1","masonry":"0","grid_columns":"clear1 col-md-12","column_width":"200","gutter":"30","grid_number":"1","infinite":"0","pagination":"0","grid_excerpt_length":"100","grid_lightbox":"0","grid_link":"0","css_class":"block-small-thumb","container_css":"","custom_css":""}
We will come together for 3 sessions of 4 (4.5) days over a period of 6-8 months with lots of practical/clinical time to focus on acquiring the skills and clinical reasoning to put the ISM model into practice. Hours of online lecture and reading material and 12 hours of in-person lecture are...
More Info